Showing posts with label Recipe. Show all posts

Thursday, 31 March 2016

Rainbow Crepe Cake for Elias' birthday

I wanted to make this Crepe Cake for a while. Finally I have a good reason for it. I risked making this because I am not sure if it will be enough for the guest that we are having over for Elias' birthday. We ended up had about 15 people including children. And I have half a cake left over. Not that it doesn't taste good but it is very filling.

 
Here's the recipe I made:

Ingredients:
  • 2/3 cup Melted butter 
  • 1 can of coconut milk
  • 1 can of evaporate milk
  • 8 Eggs 
  • 2/3 cup Cake flour 
  • 1/3 cup All purpose flour 
  • 1/4 Tsp. Salt 
  • Food coloring (purple, blue, green, yellow, orange, red) The rainbow color 
  • 1.5 litre Whipping cream 
  • 1 cup Icing sugar
Next is the steps that I did to make rainbow crepe cake:
  1. Beat eggs 
  2. Add evaporate milk into the mixture then add coconut milk. Mix well until combine. 
  3. Add melted butter. Make sure it's not too hot so it won't cook the eggs. Mix well to combine. 
  4. On the other bowl, mix 2 kinds of flour. Add salt and mix.
  5. Add the dry ingredients to the wet ingredients and mix together until smooth. 
  6. Divide the dough into 6 small bowls. I divided them equally.
  7. Add each food coloring to each bowl and mix together until you get the color that you like 
  8. Heat the pan. I used very low heat. I rubbed butter on the pan a bit just to help it not to stick on the pan.
  9. Add the first mixture into the pan. I only use 1/4 cup at a time. I got 3 crepes from each color. I recommended to start with purple color first so that when you put each layers together you will have purple on top just like the rainbow color. 
  10. Once your crape cooked, remove by flip it onto a wire rack.  Once it cooled down, I moved it onto wax paper.
  11. Cook all the crepe. Make sure you put wax paper in between each crepe so that it won't stuck together later.
  12. Beat whipping cream with icing sugar.
  13. Now this step, we are going to put it together. Place the first crape on a cake stand or a cake plate. Start with red color. Then add whipped cream on the crepe. Make sure you add enough whipped cream so that it won't taste just like dough. After that put another red crepe on and add whipping cream. Keep doing this start from red , orange, yellow, green, blue and purple color until you use up all your crepe. 
  14. Put in the refrigerator for 20 minutes to set the cream. 
  15. Done!
The bump you see is from where we put the candles. I wasn't fast enough to take pictures.
 
It took me a few hours to make this crepe cake but it turned out really beautiful. Cooking the crepe took me the longest. My stove is not the easiest stove to control the heat. 


Friday, 13 November 2015

Boost up your fiber with Kellogg's All-Bran this fall

I don't know how many of you are joining the "Comfort food moderne" trend this fall. It is one of the hottest food trends this year. Kellogg's All-Bran is also making it easy to indulge and get inspired.


To inspire Canadians, Kellogg's All-Bran has partnered with three top Canadian chefs to crate on-trend comfort food dishes. You might heard about their names before, Chef Craig Harding from Campagnolo (Toronto), Chef Connie DeSousa from Charcut (Calgary) and Chef Alexandre Gosselin from Chez Victorie (Montreal).

Find more recipes by visiting All-Bran. There are many surprising menus. Don't forget to check out All-Bran Pinterest page for re-pin your favourites.

For now, I would like to share my favorite recipe that I got. This is a recipe from Calgary Chef Connie DeSousa. It is a very easy recipe and it looks good! I changed the recipe a little bit so if you want the original one, you can get it from All-Bran website.

All-Bran Cheesecake Crunch in a Jar with Seasonal Fruit


Ingredients:

3/4 Cup heavy cream
1/4 cup icing sugar
1/2 each vanilla
1 1/4 cups chocolate cream cheese
1/3 cup All-Bran Buds
1/2 cup frozen fruit
Directions:

  • Whip heavy cream, icing sugar and vanilla in small mixer until cream is at a soft peak. 
  • Scrape cream out into bowl and place int he fridge until you are ready to fold in remaining ingredients.
  • Beat cream cheese with paddle attachment frequently scraping down bowl until there are no lumps.
  • Fold whipping cream into cream cheese and mix slowly until fully incorporated and smooth.
  • Place the cheese mixture into piping bag with large straight tip and layer jars with cheese filling, All-Bran Buds cereal and your seasonal fruit.

Makes: 4 1/2 cup mason jars.


Wednesday, 14 October 2015

Dark Chocolate Oatmeal Cookies

I like this recipe because it is not too sweet. I try to cut down some sugar in our diet. At first I am afraid that it will not be sweet enough but I think it turned out great! My husband loves it.

Ingredients:

3/4 cup all purpose flour

1/4 cup unsweetened cocoa powder

1/2 teaspoon baking soda

1/4 teaspoon salt

1/2 cup unsalted butter, room temperature

1/4 cup sugar

1/2 teaspoon vanilla extract

1/4 cup oats

1/4 cup semisweet chocolate chips

Preparation

Preheat oven to 350°F. Butter large rimmed baking sheet.

Sift first 4 ingredients into medium bowl.

Using electric mixer, beat butter in large bowl until fluffy. Add sugar and vanilla; beat until blended.

Add flour mixture and beat until moist clumps form.

Mix in oats with spatula until evenly distributed.

Add chocolate chips and knead gently to blend.

Shape dough into a ball. Place on prepared sheet; then flatten.

Repeat with remaining dough, spacing rounds about 2 inches apart.

Bake cookies until center is slightly firm and top is cracked, about 14 minutes.

Cool on sheet. Yum!

Sunday, 3 May 2015

Handpicked Spring Snacking from The Healthy Shopper ‏2015 #Review #Giveaway

It is finally spring time. I love seeing all the colorful flowers coming up in my garden. As usual just like every spring, The Healthy Shopper has handpicked some healthy snacks for you. This year, they introduces a new and unique snack with clean ingredients that’s easy to pop in your mouth. It is popcorn that different from any popcorn we’ve ever tasted. This is one of the most popular items, peanut butter with a coconut twist.


Earth Balance P.B. Popps, is a delicious popcorn coated with oats and cuddled in a peanut butter cluster that make a yummy snack. These crunchy nuggets are Non-GMO, Vegan, Dairy and Gluten-Free and have 0g trans fats. Earth Balance P.B. Popps retail for $5.99.


The next one is, Earth Balance Creamy Coconut & Peanut Spread. 

http://schrenkpr.com/wp-content/uploads/2015/03/Earth-Balance-Creamy-Coconut-Peanut-Spread.jpg

Imagine peanut butter with a coconut flavour? Earth Balance Creamy Coconut and Peanut Spread is one of our family favorite. My husband and my daughter always have their breakfast with this. It is great on toast, in stir-fry dishes, smoothies or a warm dip for crisp apples or celery. The price is $6.99 per bottle. Both products are available at Loblaws.

I have some awesome recipe to share with my readers here.This recipe was written by Made Just Right Team.


Chocolate-Peanut-Butter-Coconut-Cupcake 

Prep Time : 20 - 30 min

Cook Time : 18 - 20 min

Yields: 12

Ingredients

1 tablespoon ground flax

3 tablespoons water

1 1/2 cups plus 1 tablespoon cake flour

1 cup refined sugar

1/4 cup plus 2 tablespoons unsweetened cocoa

1/2 teaspoon baking soda

1/2 teaspoo n sea salt

1/4 cup plus 2 tablespoons unsweetened applesauce

1 teaspoon vanilla extract

1 cup brewed coffee, cooled

1 cup Earth Balance® Organic Original Soymilk

3 tablespoons Earth Balance® Natural Shortening

3 tablespoons Earth Balance® Organic Coconut S pread

1/4 cup plus 2 tablespoons Earth Balance® Creamy Coconut and Peanut Spread

1/2 teaspoon vanilla extract

2 cups confectioners sugar

Directions

  • Preheat your oven to 350 degrees Fahrenheit.
  • Stir together the ground flax and water. Set aside.
  • In a large bowl, whisk together the flour, refined sugar, cocoa, baking soda and sea salt.
  • In a separate bowl, stir together the applesauce, vanilla extract, brewed coffee, Earth Balance Organic Original Soy milk and flax + water combo.
  • Add the wet ingredients to the dry ingredients and stir until fully combined.
  • Spoon the batter into cupcake liners until nearly full.
  • Bake for 18 - 20 minutes, or until a toothpick can be inserted and removed cleanly. Allow the cupcakes to cool completely.
  • Make the frosting by mixing together the Earth Balance Natural Shortening and Earth Balance Organic Coconut Spread on low - medium speed.
  • Add in the remaining ingredients (except for the coconut flakes) and continue to mix until fully combined.
  • Top the cupcakes with the frosting and sprinkle each cupcakes with coconut flakes. 

Giveaway
One of my lucky readers will win Earth Balance P.B. Popps and Earth Balance Creamy Coconut & Peanut Spread to enjoy this spring. This giveaway open to the residence of Canada only.

Thursday, 16 April 2015

Do you know that Mung Beans is one of the Superfoods?

Mung Bean or Vigna radiata (L.) R. Wilcz., in FABACEAE family, is one of the common food that I grew up with. It is super cheap but the benefits are super! I found it in Asian aisle at Super store.


Coming from Thailand, we use them as dessert. I know, many of you probably says I am weird. But that is how I grew up. You don't have to use them for dessert like me but you can add them to your soup recipe or your rice!

Here are the health benefits:

  • High in Potassium
  • Anti Cancer
  • Give energy, improve immunity
  • High in Magnesium
  • Help lower blood pressure
  • Help to increase appetite
  • Reduce cholesterol levels
  • Help weight control
  • Reduces the risk of heart disease
  • High in Iron
  • Reduces blood sugar levels and diabetes
  • High in Calcium and Phosphorus
  • Help prevent and treat osteoporosis
  • Stimulates nervous system
  • Treat hang over
  • mumps treatment
  • High in fiber
  • High in Vitamin B2
  • Heal inflammatory bowel
  • Heal nephritis
  • Heal rash
  • Heal Rheumatology
  • Heal ulcer
  • Heal diarrhea
  • Heal ascites
  • High in Vitamin B1
  • High in Folic
  • many more!

Friday, 6 February 2015

Green Tea Cake Roll with chocolate cream cheese #Recipe


Ingredients

For the cake :

4 eggs, separated

2 tablespoons butter, melted and cooled

6 tablespoons sugar

2/3 cup flour

3 tablespoons corn starch

1 tablespoon matcha (finely powdered green tea)

a good pinch of salt


For the filling:

I used chocolate cream cheese beat with powder sugar.

Instructions


  1. Prepare the cake. Preheat the oven to 200°C (400°F) and line a 35-by-25-cm (14-by-10-inch) jelly roll pan with parchment paper.
  2. In a medium mixing bowl, combine the egg yolks with butter and sugar. Beat well. In another bowl, sift together the flour, corn starch, and matcha. Stir the flour mixture into the egg yolk mixture until just blended, try not to over mixing.
  3. Place the egg whites and the pinch of salt in a clean, grease-free mixing bowl, and whisk until stiff. Stir one third of the egg whites into the batter. Don't over mix it. The batter should looks creamy.
  4. Pour the batter onto the prepared pan or sheet, making sure it reaches the corners, and smooth out the surface gently with the spatula. Bake for 6 to 8 minutes, keeping a close eye on it, until just set; it should not color. (If you are overbaked, which I did for the first time, it won't be able to roll.)
  5. While the cake is baking, prepare the filling. Set aside.
  6. Once the cake is baked, you have to work quickly while the cake is still warm, otherwise it will be too stiff to roll. Slide the parchment paper and cake on a cold baking sheet or a tray.
  7. Cover with a clean dishtowel (or a fresh sheet of parchment paper) and flip cautiously onto your work surface. Remove the cold baking sheet or tray and carefully peel off the sheet of parchment paper on which the cake baked. The cake will now be upside-down.
  8. Spread the filling onto the cake, leaving a margin all around. Roll the cake tightly onto itself, starting from the edge closest to you. Wrap the rolled cake tightly and place it seam side down in the fridge to set for a few hours or overnight.

Wednesday, 7 January 2015

Matcha Green Tea Shortbread Cookies

Shortbread and Matcha are both my favorite. What if I combine them together?


Ingredients

1 cup butter, room temperature

1½ cups all-purpose flour (1 tbsp. removed.)

½ cup powder sugar

1 tsp. vanilla

2 tbsp. matcha powder

Instructions

Preheat oven to 350F. Line baking sheet with parchment paper or use a non-stick pan.

Mix all the ingredients together until well combined. I found the texture is easy to work with.

Measure out 1 tablespoonful sized portions and roll into balls. Press down slightly on each cookie ball.

Bake for 10-13 minutes, or until bottom of cookies are lightly brown. Be careful, don't over bake.

Cool on pan for about 5 minutes and then move to wire rack.

Now that I tried them, they are not too sweet. It is only half a cup of sugar. If you like Matcha, I think you will love it. But if you don't like Matcha, it might taste weird for you.

Trying out #MatchaGreenTea recipe, Match green tea shortbread cookies.

A photo posted by Narathip Wall (@narathipwall) on

Trying out #MatchaGreenTea recipe, Match green tea shortbread cookies.

A photo posted by Narathip Wall (@narathipwall) on

Trying out #MatchaGreenTea recipe, Match green tea shortbread cookies. Not too sweet. Very matcha taste.

A photo posted by Narathip Wall (@narathipwall) on

Wednesday, 24 December 2014

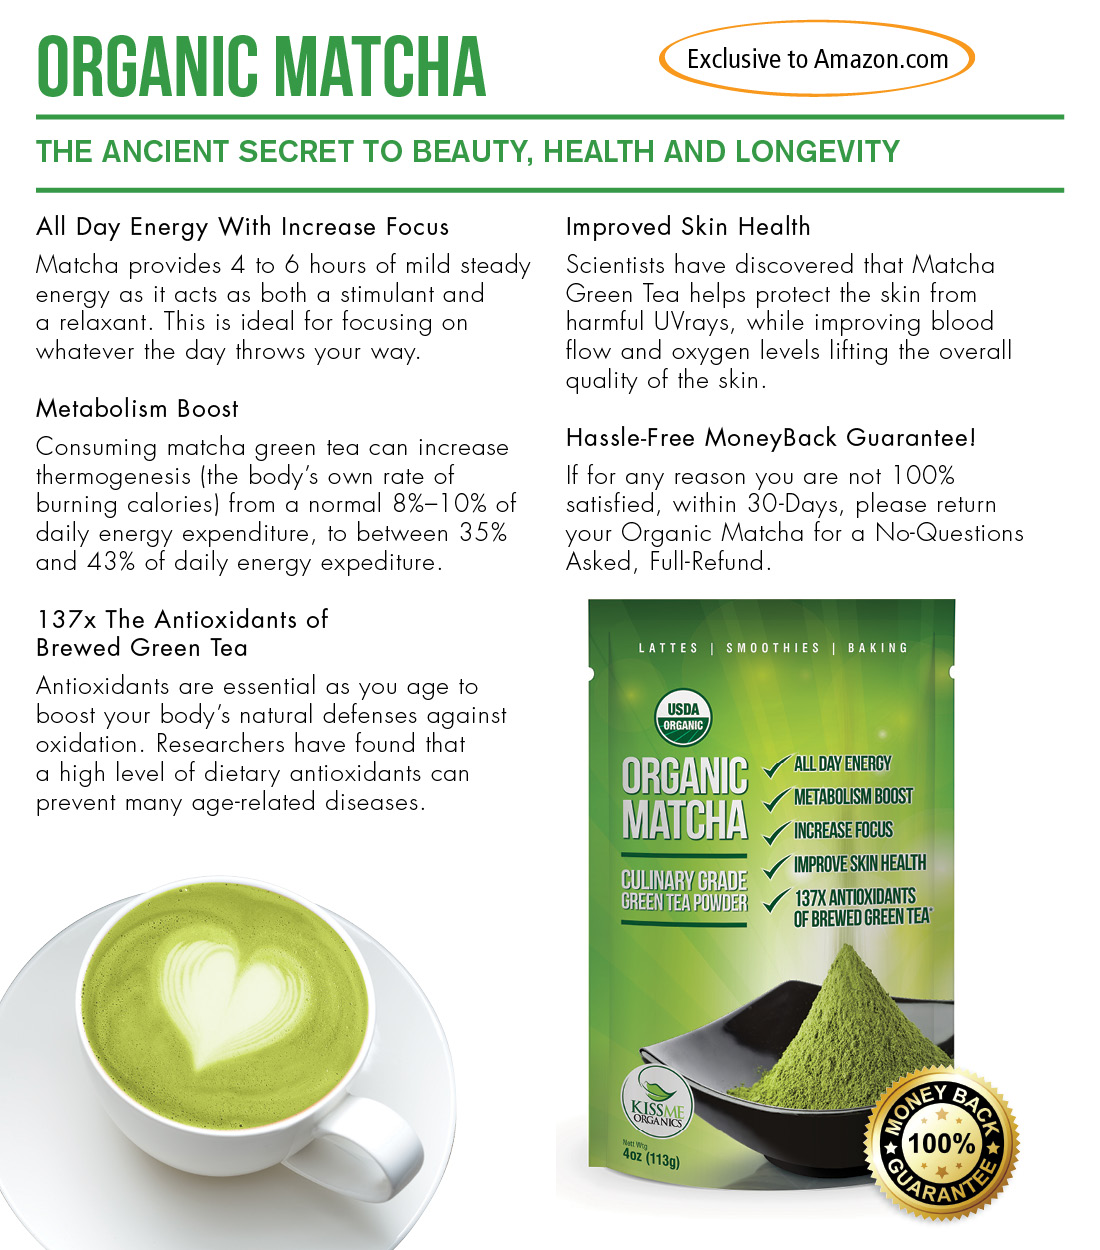
My new love: Kiss Me Organics Matcha #Review

I love Matcha green tea. Green tea frappuccino is my favorite drink. I love the smell and the taste of it. Only Matcha powder can be a little bitter but the benefit of Matcha is incredible.


I got a chance to try Kiss Me Organics Matcha. I was super excited and couldn't wait until it comes. Fortunately, after I put the order in, it came within a few days! I didn't expect that. Awesome and fast delivery.


The daily dose is 1/2 - 1 teaspoon. There are many recipes that we can use Matcha in our cooking, not just only my frappuccino drink.

Here is one of the recipe:
Matcha Tea Cake
From Robert Wemischner, Author of "The Dessert Architect". This recipe was featured on tching.com.

Yield: One 9-inch round cake, to serve 6

3 ounces (3/4 cup) cake flour
1 t. Matcha tea (ingredient grade)
6 ounces (4) whole large eggs, at room temperature
3 ounces (scant ½ cup) granulated sugar
Powdered sugar for dusting the top of the cake before serving, if desired

1. Preheat the oven to 350 degrees F.
2. Sift the cake flour with the tea three times. Using aerosolized pan spray, coat the bottom of a 9-inch round cake pan lightly. Place a round of parchment paper on the bottom of the pan and spray the parchment lightly. Set the pan aside.
3. Place the eggs and sugar into a heatproof bowl. Place the bowl over a pot of simmering water (the bottom of the bowl should be above the level of the water). Whisking constantly, heat until the eggs and sugar feel warm to the touch (approximately 100-110 degrees F.).
4. Then pour the mixture into the bowl of an electric mixer, outfitted with a whisk attachment, and beat until light in color and texture, approximately tripled in volume.
5. Then, gently but thoroughly, fold the dry ingredients into the egg foam without deflating, making sure that there is no undissolved flour lurking at the bottom of the mixing bowl. Immediately scoop the mixture into the prepared cake pan and bake for approximately 25 minutes, or until the cake tests done when a skewer is inserted into the center.
6. Cool on a rack. Dust with sifted powdered sugar just before serving, if desired.

Buy it!
You can purchase it from Amazon website: Amazon.com, Canada or UK. It is CDN$29 for 4 oz or 113g. It last forever. You don't need a lot to use at a time.

Thursday, 23 October 2014

Cooking healthy with Kiva Organic Stevia #Review and Matcha green tea recipe

Our family visits a natural path doctor regularly. We have learned that there are many reasons that we should avoid adding sugar to our food. I would like to avoid as much as possible but certain foods just don't taste complete without sweetness. Our natural path doctor recommended that we should try Stevia instead of sugar.

I got to try out Kiva Organic Stevia from Kiva Superfood in 8 OZ container which is not too big but I am sure it will last quite a while. If you have tried Stevia before, you would understand what I mean. It is very sweet that you only need a little at a time.


What made me interested in KIVA organic Stevia powder?
I like that it is organic and blended with Erythritol which is a naturally-occurring sugar alcohol found in fruits and vegetables. It comes in powder form which make it easy to use with snap-lid.


I tried this with my favorite drink, Matcha green tea ice latte.

Matcha green tea ice latte
Serves 1

1 teaspoon Matcha powder
1/4 teaspoon Kiva Organic Stevia powder
1 cup almond milk
1 cup ice cubes


In a blender, add ice, almond milk, Kiva Organic Stevia powder and Matcha powder and blend until smooth. Enjoy!


Matcha usually gives bitter taste. Adding a little bit of sweetness, make your drink way tastier! I can enjoy my favorite drink even more when I know I am not having sugar. It definitely enhances the flavour of my drink and sweetens is just like sugar. No after taste.

Buy it

Kiva Organic Stevia powder is on sale on Amazon at $14.80. Plus you can get 15% off all Kiva products by using promo code: GoodKiva. This will work on Kivahealthfood.com and Amazon. (Expires 12/1)

I received one or more of the products mentioned above for free using Tomoson.com. Regardless, I only recommend products or services I use personally and believe will be good for my readers.

Tuesday, 15 July 2014

Oh how much I love you #MatchaGreenTea

Green tea is one of my favorite drink. I have learned that green tea is super healthy for our health. If I go to coffee shop, I usually order green tea frappuccino, even on the cold day! That is how much I love it. lol

I got a wonderful opportunity to try Matcha DNA. This is just like my dream comes true because I can make my favorite drink at home! Check out their website and try many other recipes they have there.

About Matcha DNA


This is premium rare Chinese origin, never radiated and nothing added powdered green Matcha tea. Matcha DNA is certified 100% organic powdered green and black tea. On the package says, One glass of Matcha DNA may equal 10 glasses of green tea in terms of its nutritional value and antioxidant content. (These statements have not been evaluated by the USFDA.)

Check out some testimony from people who tried Matcha DNA. 


Matcha is about 13 times ORAC antioxidant value more than blueberries and pomegranates.


Matcha has promotion on their website if you sign up for their newsletter, they will send you a $19 worth Matcha green tea///super food book by Shaahin Cheyene.

Interested in Matcha DNA? You can purchase it conveniently from Amazon and get it delivery right to your house.

Now I can enjoy my favorite drink at home everyday and cheaper than go to the coffee shop!

I received one or more of the products mentioned above for free using Tomoson.com. Regardless, I only recommend products or services I use personally and believe will be good for my readers.

Friday, 18 April 2014

Happy Easter with Kellogg's Rice Krispies #Shareasmile

Spring is finally here and Easter as well. This weekend, our family has come together. I used this opportunity to make some Rice Krispies for the kids so that they can decorate together. I love giving my kids projects to do. I believe they can learn so much from the activities. I don't like giving my kids TV time all the time. I know that it is difficult and take a lot of time but it's worth my time.

My daughter enjoy coloring time.

Kellogg's Rice Krispies recipes have many great and easy ideas that you can do with your kids. My daughter and her cousins had a lot of fun today decorating Rice Krispies that I made ahead for them. They were so excited when I told them what are we going to do today. One of my niece was super excited! My daughter really wants to decorate since we got Kellogg's Rice Krispies kit yesterday.

 She put some candies in her bird nest.

 Enjoy decorating and of course eating too!

My niece really proud of her master piece!

If you would like to try this easy recipe with your kids, check out Egg Nests from Rice Krispies here.

Happy Easter everyone!

Monday, 31 March 2014

Think Healthy, Eat Healthy Stay Well and have fun with NuNaturals (Review and Giveaway)

Disclosure of Material Connection: I received one or more of the products or services mentioned for free in hope that I would mention it on my blog. Regardless, I only recommend products or services I use personally and believe will be good for my readers. I am disclosing this in accordance with the Federal Trade Commission's 16 CFR, Part 255: "Guides Concerning the Use of Endorsements and Testimonials in Advertising. I received no financial compensation for writing my review. This is my completely honest opinion and may be different from yours.

I got an opportunity to try out NuNaturals products. I have heard about NuNaturals products before and I am so excited for this opportunity. I love that NuNaturals products are prebiotic ingredient. Prebiotics feed probiotic bacteria like acidopholis found in yogurt. They help the good bacteria in the digestive system multiply. They also help to reduce Carbohydrates in our diet. NuNaturals products are FOS Free. They won't create gas or other digestion problems.


I got to try many NuNaturals products. One of them that I just used for my family lunch today is NuStevia Reb99 Pure Extract Powder 1 oz. It is a pure extract of the Stevia plant. I usually cook our family meals without sugar but sometimes my food doesn't taste right. So today I substitute sugar with NuStevia instead. My husband said it taste really good!

Came with all these products, I also got great healthy recipes that I can use NuNatural products with. There are many of them that I think I could turn them into a recipe book. However I used Lemon NuStevia Liquid, 2 oz. bottle with one of my favorite recipe, Yogurt Cake.

Ingredients
1 cup butter, softened
1/2 cups white sugar
2 eggs
1 teaspoon lemon extract
2 1/4 cups Gluten free all-purpose flour
1/2 teaspoon baking soda
1/2 teaspoon salt 1 (8 ounce) container lemon flavored yogurt
6 drops Lemon NuStevia Liquid

Directions
1.Preheat oven to 325 degrees F (165 degrees C). Grease and flour a 10 inch bundt pan. Mix together the flour, baking soda and salt. Set aside.

2.In a large bowl, cream together butter and sugar until light and fluffy. Beat in the eggs one at a time, then stir in the lemon extract. Alternately beat in the flour mixture and yogurt, mixing just until incorporated.

3.Pour batter into a 10 inch Bundt pan. Bake in the preheated oven for 60 minutes, or until a toothpick inserted into the center of the cake comes out clean. Allow to cool 10 minutes in the pan, then turn out onto a wire rack and cool completely.

My cake turn out really good. I actually baked this recipe for my husband birthday this year and everyone loves it. I am sorry that I didn't have a chance to take a picture. As some of you may know that I just got back from the hospital with our new born baby. The cake went fast and I didn't have a chance to bake another one yet.

If you are interested in NuNatural products, make sure to visit their website. They have many deals and coupon codes to give you awesome discount! Special for my readers, use coupon code "BLG0614"  and receive 15% DISCOUNT on the ENTIRE ORDER. This discount remains  EFFECTIVE UNTIL  JUNE 30, 2014. Online ordering customers may also receive FREE SHIPPING to the CONTINENTAL U. S. on all orders exceeding   $35.00 after discounts.


Giveaway!
4 of my lucky readers will win (1) one bottle of each of the Lemon / Cherry Vanilla / Peppermint Flavored Stevia Liquids, PLUS a 50 pkt box of our NuStevia White Stevia Powder packets. Each of the 4 winners will receive the complete product selection of all 4 items with the retail value of $ 48.00 , PLUS A FREE BONUS PRODUCT ! This giveaway open worldwide. No PO box address.

LinkWithin

Related Posts Plugin for WordPress, Blogger...